Nervecentre V9.0 Help for Users
Viewing and completing your pull lists
As a medical records clerk, you can view and complete pull lists you have been assigned. You can also suspend loan requests.
 What is a pull list?
A pull list is a list of case note volumes that need to go from one location to another. For example, you might have a pull list that contains all the loan requests from the Medical Records Library to Ward 15. A medical records manager assigns a pull list to a medical records clerk. The medical records clerk finds the case note volumes on that pull list and takes the volumes to the location that requested them.
Viewing and completing your pull lists on a mobile
You can't do this on a mobile.
Viewing and completing your pull lists on a desktop
Overview of My Pull Lists
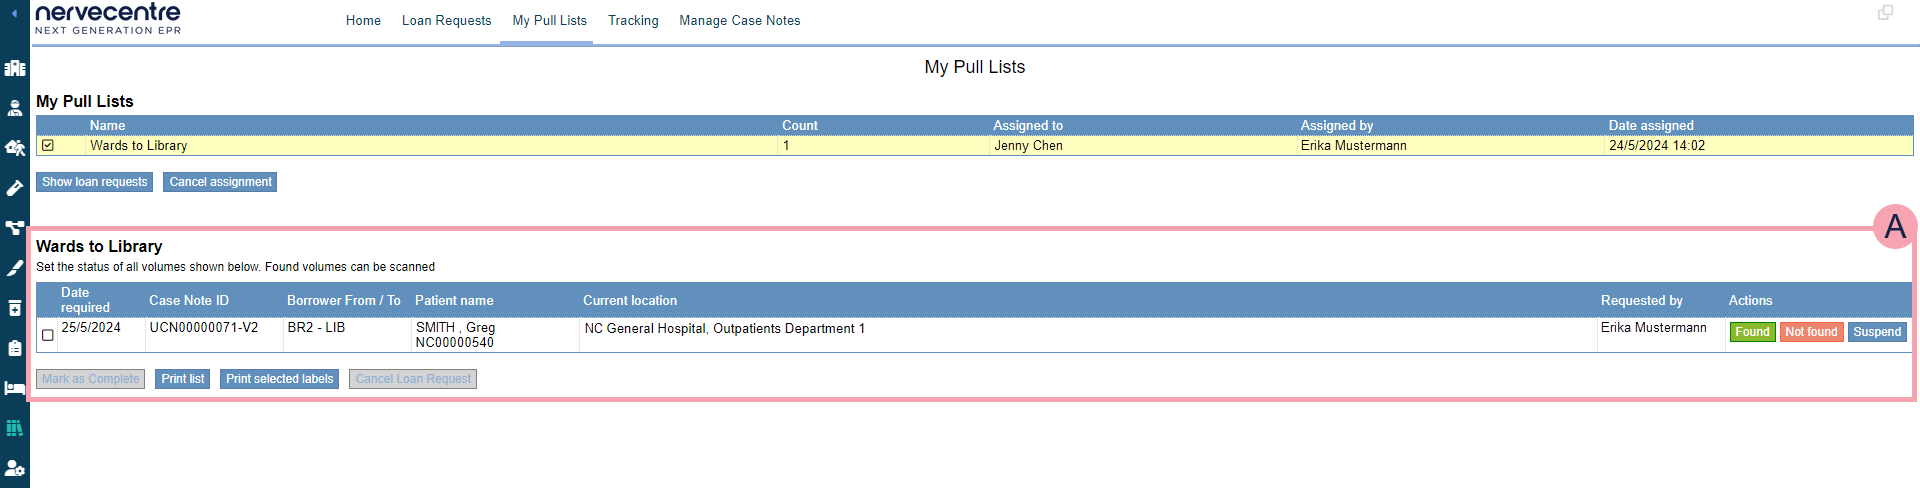
From Medical Records > My Pull Lists, you can view and complete pull lists you have been assigned.
|
My Pull Lists |
Shows a list of pull lists you have been assigned. |
|
Name |
The name of the pull list. |
|
Count |
The number of loan requests in the pull list. |
|
Assigned to |
The name of the user who has been assigned the pull list. |
|
Assigned by |
The name of the user who assigned the pull list. |
|
Date assigned |
The date and time the pull list was assigned. |
|
Show loan requests |
Select to view loan requests for the selected pull list. |
|
Cancel assignment |
Depending on your permissions, you can unassign a pull list. Select this to unassign the selected pull list. |
|
|
Shows the loan requests for the selected pull list. |
|
Date required |
Shows the date a case note volume needs to be its destination. For example, if a case note volume is going from a ward back to the library, this is the date the case note volume needs to be in the library. |
|
Case Note ID |
Shows the ID for the case note volume. |
|
Borrower From / To |
Shows the borrower codes for:
|
|
Patient name |
Shows the name of the patient. |
|
Current location |
Shows the current location of the case note volume. |
|
Requested by |
Shows the name of the user who made the loan request. |
|
Actions |
Select an action.
|
|
Mark as complete |
Select to mark the loan request as complete. |
|
Print list |
Select to print a list of the loan requests. |
|
Print selected labels |
Select to print labels for the selected case note volumes. |
|
Cancel loan request |
Select to cancel the selected loan request. |
 Completing your pull lists
-
From Medical Records > My Pull Lists, select a pull list.
-
Select Show loan requests to view loan requests in the selected pull list.
-
Select Print list.
A PDF opens in your organisation's PDF reader.
The PDF lists all loan requests in the pull list.
-
Print the PDF file.
-
For each case note volume on your pull list:
-
Go to the current location of the case note volume.
-
Search for the case note volume.
-
Mark the case note volume as 'Found' or 'Not found'.
-
To mark a case note volume as 'Found', select Found.
Nervecentre immediately updates the location of the case note volume. The loan request stays assigned to you until you mark the pull list as complete.
-
To mark a case note volume as 'Not found', select Not Found and enter a note.
-
To remove a mark of 'Found' or 'Not found', select .
You might do this if you mark a case note volume as 'Not found', but then someone finds the case note volume.
You might also do this if you mark the case note volume as 'Found', but you then realise you found the wrong volume. If you do remove the status 'Found', you must manually track the case note volume back to its previous location.
-
-
Select the case note volume in the pull list.
-
Select Print selected labels.
A PDF opens in your organisation's PDF reader.
The PDF contains a tracking label for the selected case note volume.
-
Print the label.
-
Attach the label to the case note volume.
This tracking label shows the location the case note volume is going to, and the borrower code for that location. For example, if the case note volume gets lost when moving between locations, the label tells the person who finds the case note volume where to take it.
-
-
Select Mark as complete.
Depending on your organisation's policy, you might mark your pull list as complete:
-
After you have marked all case note volumes on the pull list as 'Found' or 'Not found'.
-
After you have delivered all case note volumes on the pull list.
-
Suspending a loan request
You only have the option to suspend if the case note volume is in a hospital location.
You might suspend a loan request when there are multiple requests for a case note volume.
For example, 'Clinician 1' has a case note volume and 'Clinician 2' has requested that volume. 'Clinician 1' still needs the case note volume. You might suspend the loan request from 'Clinician 2' for a few days until 'Clinician 1' has finished using the case note volume.
The staff member who requested the case note volume doesn't get notified in Nervecentre about the suspended loan request. They can monitor their request from Loan Requests, or from Patient Detail > Manage case notes. Follow your organisation’s policy for notifying staff members of suspended loan requests.
To suspend a loan request:
-
Select a pull list.
There are two ways to do this.
-
From Medical Records > My Pull Lists, select a pull list.
-
From Medical Records > Manage Case Notes > Pull Lists > Assigned Pull Lists, select a pull list.
-
-
Select Show loan requests to view loan requests in the selected pull list.
-
To suspend a loan request, select Suspend.
-
Enter the number of days the loan requests is suspended for.
-
Enter any notes.
-
Select Suspend.
Did you find this article helpful? Yes No
Sorry about that. Our help is a work in progress and we welcome any feedback.
Why wasn't this helpful? Please select one reason:
Great!
Thanks for taking the time to give us some feedback.